Voice Input
Peon AI supports speech-to-text via any Whisper-compatible transcription endpoint. Recording is started and stopped with the microphone button in the chat toolbar.
Setup
Open Window → Preferences → Peon AI → Voice Input.
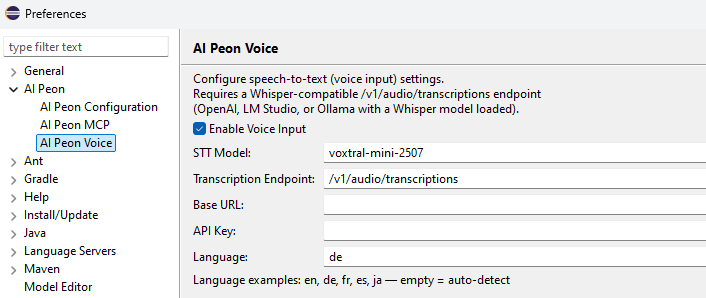
Enable Enable Voice Input — the microphone button will appear in the chat toolbar once enabled.
Fields
| Field | Description | Default |
|---|---|---|
| STT Model | Model name sent to the endpoint | voxtral-mini-latest |
| Transcription Endpoint | Path appended to the base URL | /v1/audio/transcriptions |
| Base URL | Override the transcription host. Leave empty to reuse the main provider URL. | (empty) |
| API Key | Override the API key for transcription. Leave empty to reuse the main provider API key. | (empty) |
| Language | BCP-47 code for better accuracy (e.g. en, de). Leave empty for auto-detect. | (empty) |
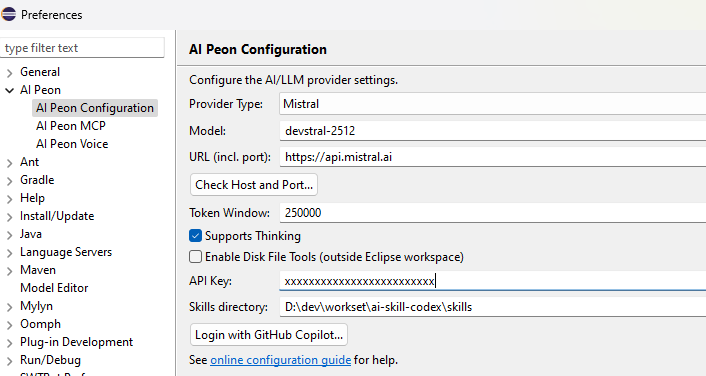
Base URL and API Key are only needed when your voice provider differs from your chat provider
If you use OpenAI for chat and Mistral for transcription, set Base URL to https://api.mistral.ai and API Key to your Mistral key. If both are the same provider, leave both empty.
Provider Examples
OpenAI
| Field | Value |
|---|---|
| STT Model | whisper-1 |
| Base URL | (leave empty — reuses model url) |
Mistral AI
Mistral exposes a Whisper-compatible transcription endpoint.
| Field | Value |
|---|---|
| STT Model | whisper-large-v3 or voxtral-mini-latest |
| Base URL | https://api.mistral.ai |
LM Studio (local)
Load a Whisper model in LM Studio and point voice input at your local server.
| Field | Value |
|---|---|
| STT Model | whisper |
| Base URL | http://localhost:1234 |
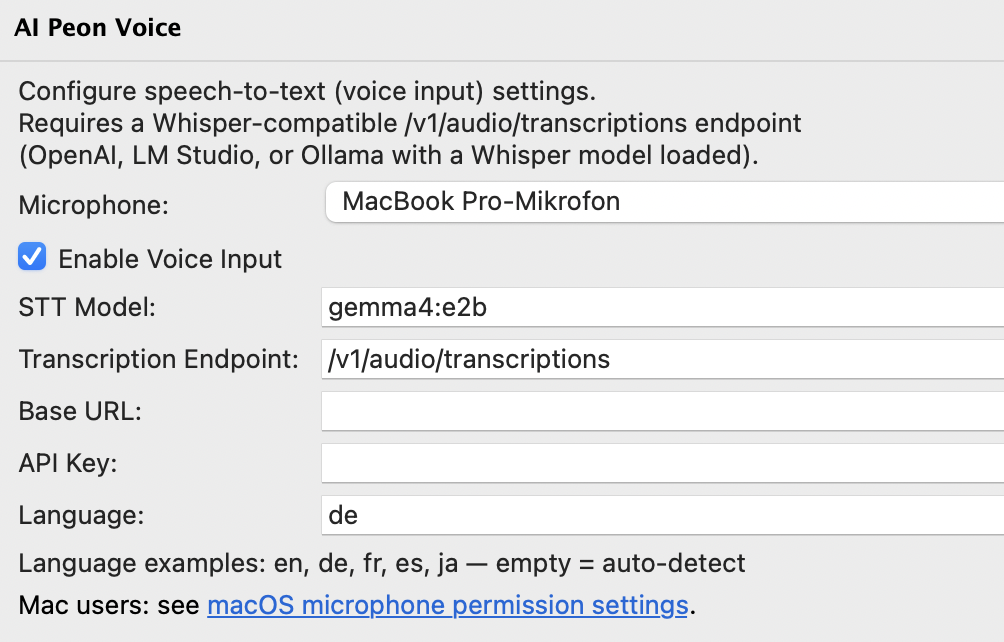
Ollama (local)
Ollama doesn't support the whisper models - gemma4 works.
| Field | Value |
|---|---|
| STT Model | gemma4:e2b |
| Base URL | http://localhost:11434 |
If you use gemma4:26b or higher for coding - reuse the model.
Usage
Click the microphone button to start recording — the button turns red while active. Click again to stop; the audio is sent to the transcription endpoint and the result is inserted into the chat input.
macOS Microphone Permissions
macOS does not automatically grant microphone access to Eclipse. When permission is denied, the system returns silent (all-zero) audio without any error, so recordings appear to succeed but produce no transcription.
If the microphone button records without producing any text, run the following three commands in a terminal, then restart Eclipse:
/usr/libexec/PlistBuddy -c \
  "Add :NSMicrophoneUsageDescription string 'Microphone access for audio recording'" \
  /Applications/Eclipse.app/Contents/Info.plist

codesign --force --deep --sign - /Applications/Eclipse.app

tccutil reset Microphone epp.package.committersAfter restarting Eclipse, macOS will show the standard microphone permission dialog the next time you use voice input. Grant access and recording will work normally. (For STS - replace Eclipse.app with SpringToolsForEclipse.app)
What each command does
- PlistBuddy — adds the
NSMicrophoneUsageDescriptionkey to Eclipse'sInfo.plist, which macOS requires before it will show the permission dialog. - codesign — re-signs the app bundle so macOS accepts the updated
Info.plist. - tccutil reset — clears any previously denied microphone entry for the Eclipse bundle so macOS prompts again.